Thursday 2 March 2017

Song#1 Missing Piece - Final Product

Good morning! Here's the last part of the 5 part series. Let's get it going!
  1. Idea Stage
  2. Composing and Arranging Stage
  3. Recording Stage
  4. Mastering Stage
  5. Final Product
Here's the intro blog on everything you need to know here :)

Soundcloud upload

With the audio completed, I uploaded it to my Soundcloud account in full glory, where you can listen in relative HD below


Preparing the Music Video

To prepare the music video for this song for upload on my Youtube account, I used my trusty Adobe After Effects CC.

What I had in mind was to create some sort of music visualiser spectrum, like those you see in iTunes. After some searching online, I came across this great resource video teaching exactly that:


I went for the simplest animation as possible with pink/maroon lines for the spectrum and the song title in the middle. I added my profile picture in the corner so that I could create Youtube annontations for viewers to click-to-subscribe later (though it was unnecessary with the latest 'end-card' tool)


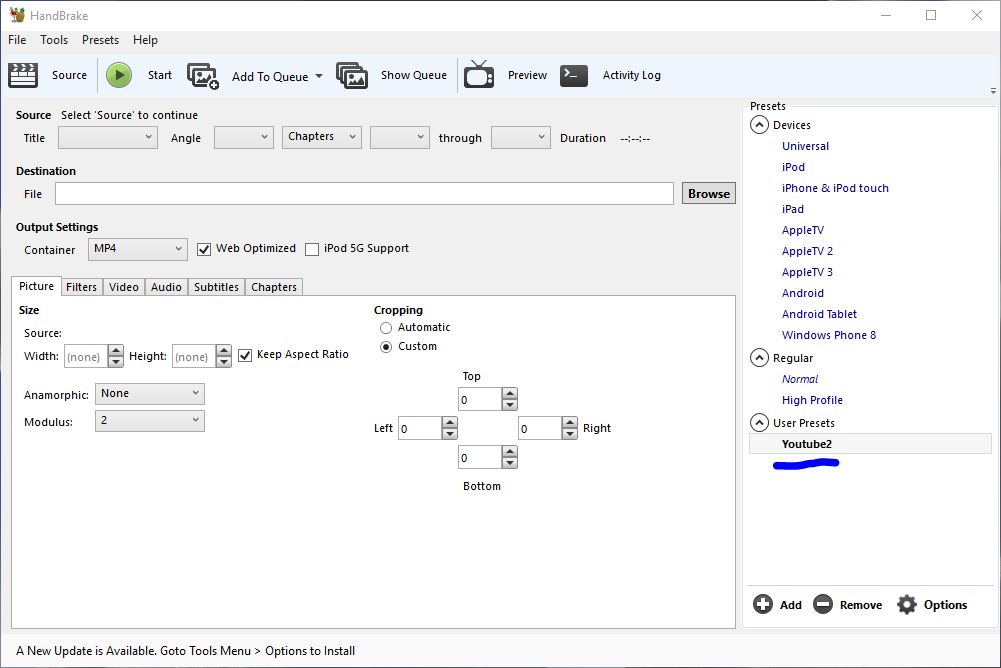
The only problem with the rendered output from After Effects is that the file is a freaking 19.4GB large!! Lucky the freeware gods has graced us with Handbrake, a video utility which I used to compress the file into a manageable 18.1MB. Here's how I did it:

  1. Previously, I've saved a settings profile specifically for Youtube uploads as in this picture below.

    Youtube settings profile
  2. Here are my settings for that
  3.  Be sure to click 'add audio tracks' or else your video won't have any

Final Product

Without further ado, let me present to you the final music video!


 PS. My gf loved it! Score one for song #1!!😄

Sheet music free DL here
https://www.4shared.com/office/7kmSWVy9ba/Missing_Piece.html

Wednesday 1 March 2017

How to add hidden text to your audio

I've always liked cool stuffs like subliminal advertising or hidden stuffs in soundtracks like Undertale. So, one day I looked up on inserting specifically 'text' into audio and found several resources online (which I'll link below).

Spectrogram image courtesy Marco Barnig

Software needed

Basically I used Audacity for editing and viewing the spectrogram and Coagula for converting images to audio. Once you've installed Coagula, your launch screen should show a few windows and a blank canvas. Go to File>Open Image and select the image you have created. I've created mine using MS Paint and I tried to minimize the blank spaces around the text. Also, it's best if you use white text on black background.

Coagula interface
After that, when your picture loads up like mine, select Sound > Render without Blue. Coagula will play your odd sounding text once its done.

When you're done there'll be a new audio file entitled "Coagula.wav" will be in the same folder as the Coagula application. You can either use that file or you can save it out to a location of your choice by choosing File>Save Sound As as from the file menu.

Once I loaded the .wav file into Audacity, I reduced the volume of the sample by  Effect>Amplify and selecting negative decibels amplification. If your hidden message is louder than your original song, I think it'll be kinda hard to mask your intentions, right?

I dropped the volume to about -50dB and had to zoom in the near flat waveform. To view your message, click the dropdown arrow next to the 'msg' word to select Spectrogram. The file will look like this:

Spectrogram view
However the bottom half of the text still looks distorted. Here, click the dropdown arrow menu to select Spectrogram Settings, which will bring up this window:

Here change the Scale to Logarithimic and press Apply/OK.

Voila! Your hidden message  in both Left and Right Audio

More resources!
Marco Barnig's writeup on the spectrogram thing> http://www.web3.lu/spectrogram-speech-processing/
Lifehacker's own guide to embedding messages > https://lifehacker.com/5807289/how-to-hide-secret-messages-and-codes-in-audio-files

Song#1 Missing Piece - Mastering Stage

Ding-dong ding-dong! It's part 4 of 5 today, le Mastering Stage! -ragequits-
  1. Idea Stage
  2. Composing and Arranging Stage
  3. Recording Stage
  4. Mastering Stage
  5. Final Product
As always, please visit this project's intro blog. 

Mastering

After obtaining the MIDI data from my Clavinova in the previous post, I transfered it to my DAW (digital audio workstation) of choice, Ableton Live. Honestly, I've been learning and using Ableton for the past few months in earnest, though I had the program a year back.

A funny story here was that me and my neighbour Chu-Gen were supposed to learn the software together over his summer break. I provided him with the MIDI devices, like my Korg MicroKey and my Novation Launchpad Pro, in exchange for him teaching me how to use the program. It goes without saying that, that deal fell through with both of our busy schedules.

I started referencing online tutorials, blogs and the software manual itself (which is pretty darn good at explaining everything with cringe-worthy jokes inside) before I tried it out on a wedding dedication song before this blog started.

Back to the song at hand, I rigged up the MIDI direct into the arrangement page as you can see below

Arrangement View
 Here's my settings for the instrument chain:
Devices settings
As you can see here, I tweaked the macro reverb level to get that pearly pearly Steinway sound (though I don't think its anywhere comparable to the real thing). To get deep into the settings, I expanded the reverb chain and tweaked the decay time, reflect and diffuse to get the sound I wanted.

Then I threw in a stock preset EQ8 for piano by Ableton called Piano EQ2 which boosts the lows and highs. Since I did the reverb settings on the Instrument itself, I turned off the Master Reverb settings but I put a Limiter under the Master as shown below:

Limiter in the Master


A Limiter helps prevent the listener from having sudden loud audio blast their ears to the moon, but also helps set the target listening level - which I set to 3.50dB (since the source MIDI is rather soft).

The song in Audacity
In the above picture, I've imported the song into a freeware audio editing program called Audacity. Here's a secret, somewhere in that audio waveform I've added an extra something. Can you spot it?

Spectrogram form
I've given you some help here. This hidden extra can only be seen in Spectrogram form. Still cannot see it? All right, I'll zoom in the end of the song for you guys n girls!

Hidden message!
There you go! My proposal at the end of every song from now on! The only problem with adding these kind of stuffs to the song is that you can actually hear it if you listen carefully. 

If you're interested in adding hidden stuffs in your audio, I've written a post on it here.

Stay tuned for the final Part V of  V for this song!

More info!

Paul Cantrell has a great resource on mastering the real piano recording itself, you can check his blog here> https://innig.net/music/recordings/method/mastering.html